 If your favorite garden plants require good drainage, it can be incredibly frustrating to have a yard that just won’t cooperate.
Fortunately, learning how to create a raised bed garden can help you transform just about any spot into a beautiful planting area.
Of course, there are some plants and trees that absolutely thrive in the excess water associated with improper drainage. In fact, one of my favorite trees is the sometimes messy, but always regal, Weeping Willow. Talk about a plant that likes it feet wet! 🙂
Unfortunately, most plants don’t seem to cope as well in overly wet areas – and many just can’t survive when left standing in too much water for extended periods of time. Therefore, it makes sense to learn about the drainage required for every plant you buy – and make sure that it is a good fit for where you plan to plant it.
Here’s a Quick Tip to Test Your Planting Area:
In order to test how much water your designated patch of soil will retain, dig a hole approximately 10″ deep. Fill it with water, and come back in a day when all the water has disappeared. Fill it back up again. If the 2nd hole full of water isn’t gone in 10 hours, your soil has a low saturation point. This means that when water soaks into it, it will stick around for a long time before dissipating. This is unacceptable for many plants, and you are going to have to do something to remedy it if you want your plants to survive.
One great method for improving drainage in your garden is to create a raised bed. This involves creating a border for a small bed, and adding enough soil and compost to it to raise it above the rest of the yard by at least several inches. You’ll be amazed at how much your water drainage will be improved by this small modification.
If you’re planning to build a raised bed, you’ll first need to decide if you are going to build it on grass or on dirt.
If you want to start a raised garden in a non-grassy area, you won’t have much trouble. Just find some sort of border to retain the planting material you will be adding. I’ve found that there is nothing that works quite as well as a few two by fours. After you’ve created the wall, you must put in the proper amount planting material. (I normally use a blend of whatever I have on hand – mulch, topsoil, peat, aged manure or compost).
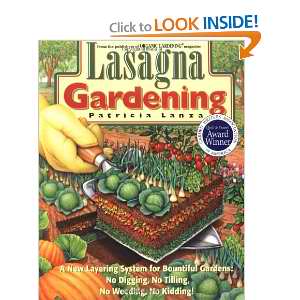
Fortunately, I am really blessed with great soil on my property, so I don’t get too fussy about what quantities I add to fill in as long as I add a fair amount of topsoil to the mix. (The book Lasagna Gardening: A New Layering System for Bountiful Gardens: No Digging, No Tilling, No Weeding, No Kidding! got me over trying to be too technical with this, too!)
If you’re trying to install a raised bed where sod already exists, all you need to do is cover the bottom of your raised bed with flattened cardboard boxes or a thick layer of newspaper. (Old school methods would have you digging up all that sod – but that is wayyyy too much like work for me 🙂 ). Basically, what you want to do is add something biodegradable (like the cardboard or newspaper) to the bottom of your raised bed to inhibit the grass from growing up into your planting area.
Planting your plants in your new area shouldn’t pose much difficulty. It is essentially the same process as your usual planting session. Just be sure that the roots don’t extent too far into the original ground level. The whole point of creating the raised bed is to keep the roots out of the soil which saturates easily.
Once you have plants in your new bed, you’ll notice an almost immediate improvement. The added soil facilitates better root development and excess water is allowed to drain freely. All of these things added together makes for an ideal environment for almost any plant to grow in.
So don’t be intimidated by the thought of adjusting the topography of your yard. It is a simple process and the long term results are definitely worth it!
